Crafts and snacks — Easter edition

By Emily Marsten, Contributor
I have always loved Easter. I get to spend time with family and friends, wear a brightly coloured spring dress to the Easter church service and spend time outside hearing the birds chirping and feel the sunshine on my face.
It always seems to me that Easter is actually the start of spring and the end of the dreaded winter. This year, things will probably look a little different, but that can also create an opportunity to be more creative.
Follow along and find some inspiration to create your own projects with these Easter-themed craft and snack ideas.
Pallet painting: creating your own Easter sign
I love a cute wooden pallet sign, but it’s so hard to find one that is both cost-effective and exactly what I am looking for. Not being able to gather together for Easter dinner with friends and family, and maybe attending an Easter church service online instead of in person, can feel disappointing. But creating a fun Easter-themed pallet sign can add a little colour to your house and help celebrate the joyful holiday of Easter!
The first step is deciding how big you want your sign to be. A good place to start is by actually scouting out a place where you want the sign to go and then judging how big you want it based on that. You might want to put it on your front door, in the kitchen, hanging in a bathroom or above your bed.
The next step is to find your pallet. Michael’s has some great ready-made pallets in lots of shapes and sizes, plus if you grab a coupon online, it can really help bring your cost down.
Now that you have the pallet, you need to decide how you will add the words. You can easily make your own stencil by typing your quote on your laptop and printing it out. Try testing out some new fonts and mix it up! Cut each letter out and trace the shapes lightly with a pencil, then you can colour it in. You could write something like “He is risen,” “Happy Easter.” I also saw an adorable sign that said, “Bunny Kisses & Easter Wishes.” The great thing about making your own sign is you can write whatever you want!
Don’t forget to add some details too! Using a ruler, you can trace and paint a simple cross or you can even grab some stick-on bunny ears or easter eggs and splash in some colour.
If you decide to paint the words and details, I would recommend using acrylic paint. Grab a few pastel colours like pinks, yellows, and blues and hop to it! Before you know it, you will have an adorable custom-made sign that you can hang up for years.
Detailed Easter eggs
At some point, I hope you have all had the opportunity to paint Easter eggs. As kids, we would often take eggs and dip them in some sloppy, half-dyed, water-concoction and create messy-masterpieces.
But painting Easter eggs can actually be a very detailed and complex creative process. Have you ever seen Ukrainian Easter eggs? Beautifully intricate and full of bright colours, these eggs aren’t your typical dye job.
Criss-cross patterns, tiny white dots, and tons of different colours can all be part of just one egg. Making these eggs is a process, so I would recommend following along with a step-by-step video. Don’t be afraid to give it a try; it might become your new favourite pastime!
But if that sounds too complicated, you can also up your Easter egg dye job by using acrylic paint. Grab a few white eggs from your fridge and bright pastel paints, and get to work!
You can even try looking at some of the Ukrainian Easter egg designs and seeing if you can copy-cat it with your artistic acrylic skills — or go rogue and just do your own thing!
In order to get less paint on your fingers, try painting half the egg and then letting it dry on some paper towel. When you’re finished, you can place them in a fun wicker basket on your coffee table.
If you decide to use these eggs as a decoration, they can typically last for up to two weeks. Make sure to throw them out when you’re done or you might have an egg-cident!
Egg-cellent desserts
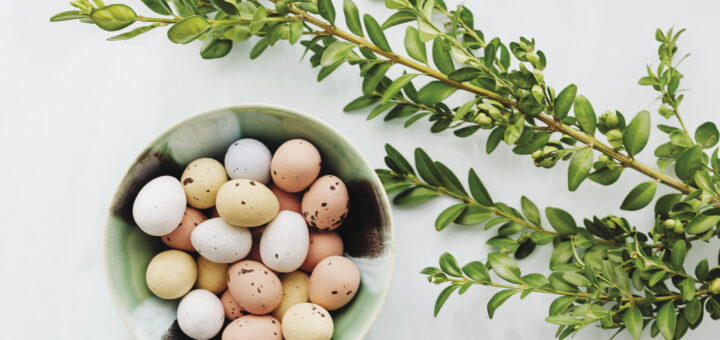
Cadbury Mini Eggs are among my favourite Easter-time treats! These brightly coloured chocolate delights don’t last long in my household, and I never tire of tearing open that violet package and popping them in my mouth.
If you’re like me and can’t get enough of these colourful treats, maybe it’s time to create an egg-cellent dessert. There are tons of options to choose from. I have always liked the idea of adding Mini Eggs to your favourite brownie recipe. After all, you can’t go wrong with adding more chocolate to brownies, right?
How about Mini Egg-decorated rice crispy squares? Or a creamy vanilla cake topped with a fluffy mass of Mini Egg icing? If it’s a hot spring day, try pouring a liberal amount of Mini Eggs into a bowl of ice cream and stir it up.
You could also use Mini Eggs as a decorating tool. Whip up a simple batch of your favourite kind of cupcakes and you can create an adorable Easter-themed scene. Try out your icing piping skills by putting icing in a ziplock bag and cutting a small hole in one corner, now you have a DIY piping bag.
Pipe on some fuzzy green grass with a twisted brown bird’s nest on top — then pop on some Mini Eggs and ta-da! Inspiration can be found all around us, or on Pinterest, so see what you can come up with and don’t forget to save some Mini Eggs for your dessert!
Shapely Snacks
I love coming across themed foods. Scrolling through Pinterest or Instagram and eventually finding hilarious and clever foods like someone’s fantastic idea to create bunny-butt pancakes — it’s a thing! This Easter season, why not take up the challenge of designing your own themed snack?
In order to create the bunny-butt pancake example, you need three sizes of pancakes, two pieces of bacon and a dollop of whipped cream or coconut flakes.
To create the body shape, start by making one large pancake, one medium pancake and two small pancakes. Place them on a plate in this order, one on top of the other: medium ‘head’, large ‘body’, and the two small ones go on either side to create the ‘feet’.
Fry up some crispy strips of bacon and place them on the top of the bunny’s ‘head.’ This will be the two floppy ears. Then place a substantial circle of frosty whipped cream on the ‘body’ to act as the bunny’s fluffy tail. There you have it, your very own bunny-butt pancakes!
Find some inspiration and run with it. Choose a theme and challenge your friends to see who can create the best masterpiece. This can be a great way to do something virtually with your friends all from the comfort of your own kitchen.


